Why it works
GitHub profiles are where technical credibility lives. Every developer has a contribution graph — those green squares that say "I ship code." Visitors read it at a glance and move on.
Add a revenue heatmap in the same visual language and something shifts. Now visitors see two graphs: code activity and revenue activity, side by side, neither needing a caption. The message lands in two seconds: this person builds things people actually pay for.
The long-game effect is just as valuable. Founders who add the heatmap early — before revenue is significant — create a visual archive. Someone checking your profile six months later will see the grid fill in, the clusters appear, the darker cells multiply. That progression is the content.
What your profile looks like
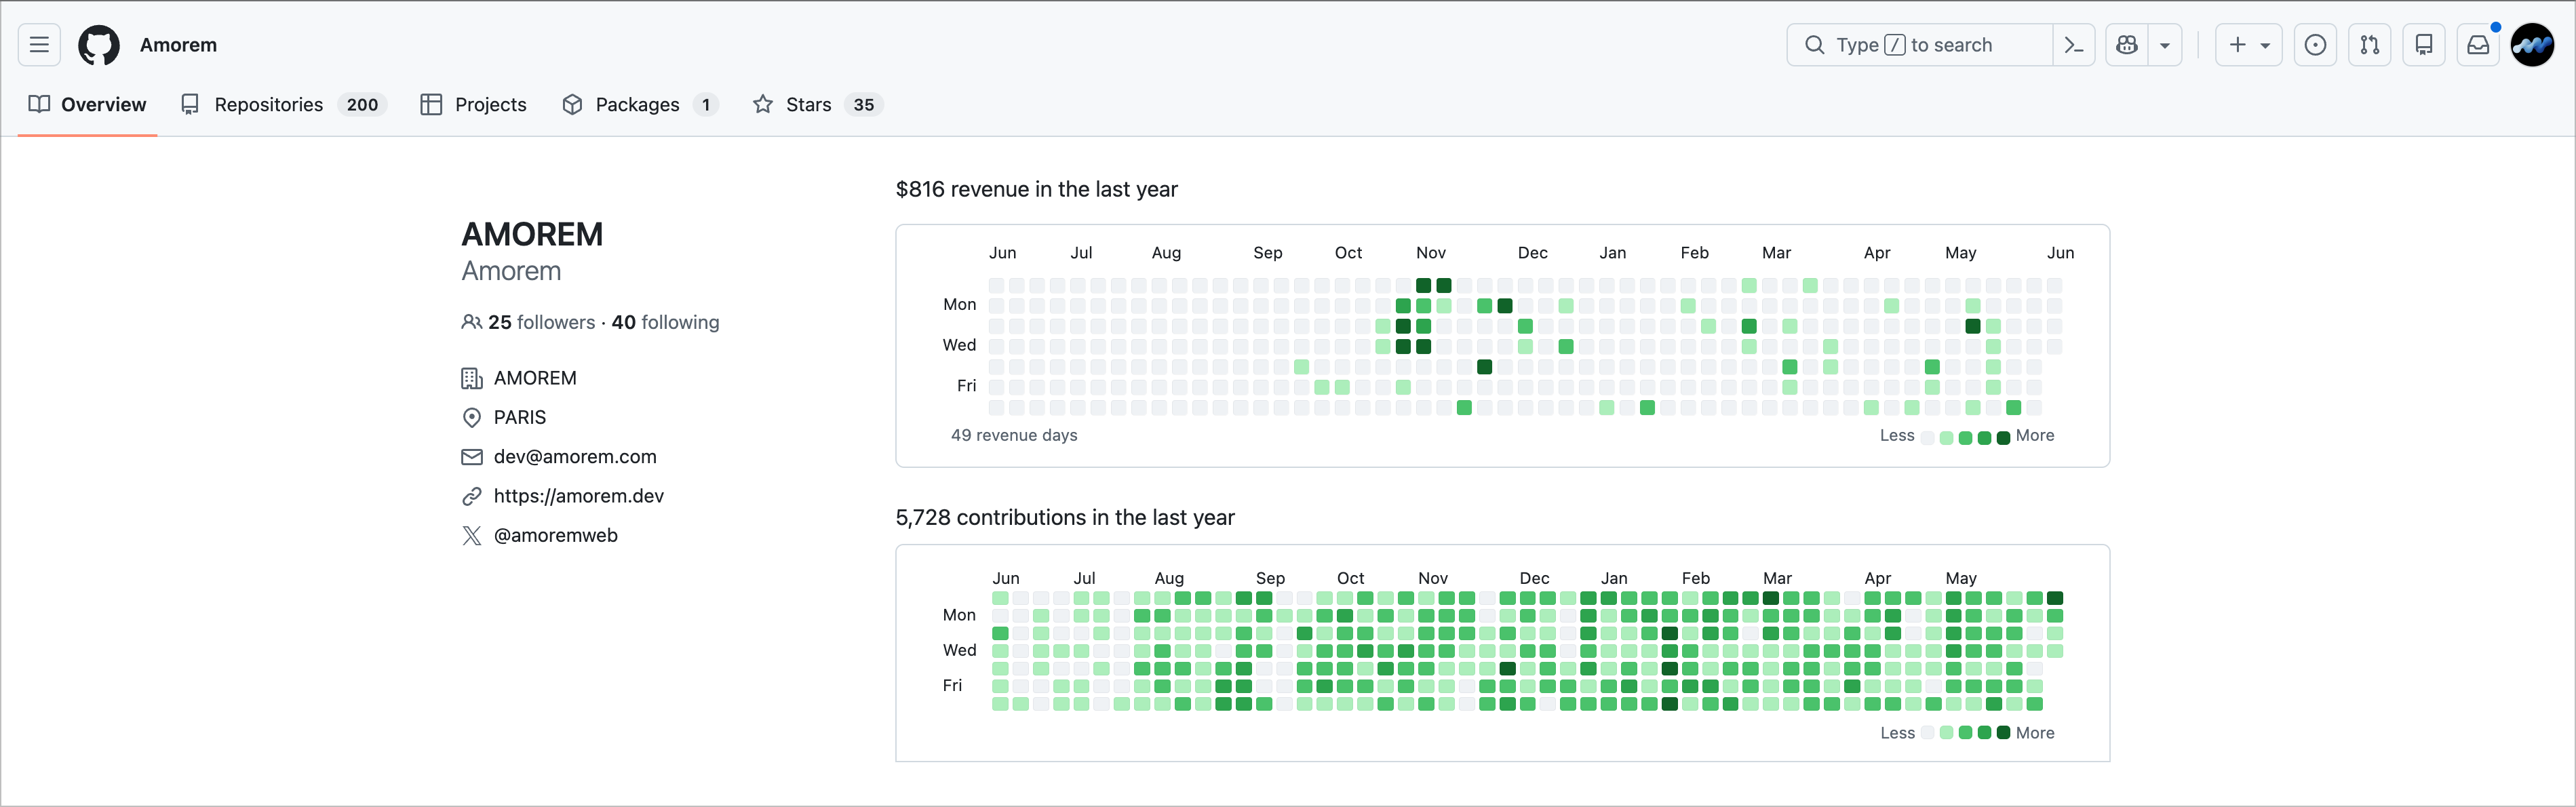
The revenue heatmap sits above your existing GitHub contribution graph. Both use the same cell grid: 52 weeks, 7 rows, colored by intensity. The headline ($816 revenue in the last year · 49 revenue days) comes from your actual transaction data and updates automatically.
The visual contrast between the two graphs is part of the story. A dense contribution graph and a sparser revenue heatmap shows exactly where you are: building hard, with paying customers starting to appear.
Set it up in four steps
Your GitHub profile README lives in a repository named exactly after your username. For github.com/alexchen, that is the alexchen/alexchen repository. Create it if it does not exist, with a README.md file at the root.
Step 1 — In MRR Calendar, go to Share → GitHub. Choose your metric, theme, and display options. The preview updates live.
Step 2 — Click Copy to get the generated snippet.
Step 3 — Paste it at the top of your README.md.
<a href="https://mrrcalendar.com/@alexchen" target="_blank" rel="noopener noreferrer">
<picture>
  <source media="(prefers-color-scheme: dark)" srcset="https://mrrcalendar.com/@alexchen/github?theme=dark">
  <source media="(prefers-color-scheme: light)" srcset="https://mrrcalendar.com/@alexchen/github?theme=light">
  <img alt="Revenue heatmap" src="https://mrrcalendar.com/@alexchen/github?theme=light">
</picture>
</a>
Step 4 — Commit and push. GitHub renders any image tag in a README automatically. The heatmap appears on your profile immediately.
From that point: nothing to maintain. The image refreshes on every page load from MRR Calendar's servers.
Which metric to use
- MRR — daily recurring revenue from active subscriptions. Recommended for subscription products. Produces the most consistent grid over time: steady months fill evenly, growth shows as increasing density.
- Sales — one-time purchases only. Better for products, templates, or courses where there are no recurring subscriptions.
- Revenue — MRR and Sales combined. Total daily cash across all transaction types.
Themes
MRR Calendar uses the exact same color palettes as GitHub's native contribution graph. The heatmap is visually indistinguishable from the grid below it.
Light theme — 5 intensity levels:
Dark theme — 5 intensity levels:
auto is recommended: the <picture> snippet switches between the two palettes automatically based on the visitor's system theme, no JavaScript needed.
Footer and labels
Footer amounts (on by default) — the summary line: $816 revenue in the last year · 49 revenue days. Shows your period total and the count of days with at least one transaction. Turn off for a minimal look.
Month labels (on by default) — column headers (Jun, Jul, Aug…) across the top.
Weekday labels (off by default) — Mon, Wed, Fri row labels on the left. Turn on to match GitHub's contribution graph layout exactly.
Filter by project
If you have multiple products or Stripe accounts connected to MRR Calendar, you can scope the heatmap to a single project's data. Useful to highlight one specific product rather than your combined totals.
Going further
The heatmap lives in your profile README, which GitHub wraps in a box with a border, a header row, and an edit button. The GitHub Profile Cleaner extension removes that box — and also hides the pinned repositories, achievement badges, and year selector that compete for attention around your heatmaps. For anyone who wants their profile to show exactly two things and nothing else, that is the next step.